Let them be fluffed! Step aside thin, penciled brows and make way for the new look that’s totally trending and so flattering! Fluffy, feathered brows are all the rage, and for good reason! This gorgeous brow trend embraces natural brows and doesn’t require waxing our brows into oblivion! However, we know feathered brows can be a bit tricky to master at first. That is why we made this step-by-step guide showing you how to get the perfect feathered brows in just 10 steps
10 Easy Steps to Achieve the Perfect Feathered Brows
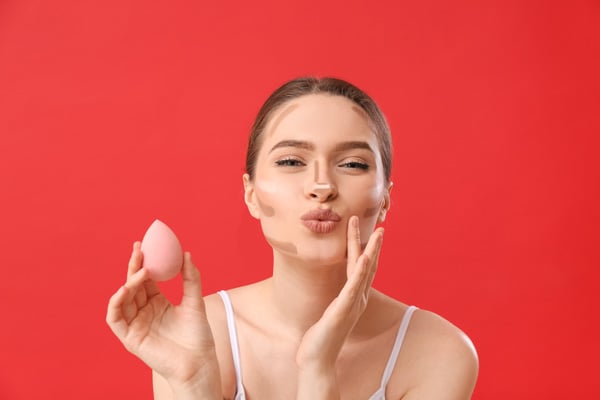
1. Start With a Fresh Face
The first step to perfect feathered brows is to start with a fresh, clean face. We recommend doing your brows before your makeup so that if you mess up, you won’t risk messing up the rest of your face to fix it. Scrub your brows with a gentle cleanser such as Micellar gel cleanser. Alternatively, if you have eyelash extensions, you can use a lash cleanser if you have some of that lying around. You will want to use a spoolie brush and gently scrub your brows in a circular motion to remove any dry skin and excess dirt and oils. Make sure you rinse them really well to ensure there’s no product left on them, which could cause your brow products to not adhere properly. Dab your brows dry with a clean towel, and you are ready for the next step!
2. Brush Your Brows Upward
The next step is to take a spoolie brush and brush your eyebrows upward. This is a huge part of what causes the feathered look. If you are serious about your brows and want to shorten the amount of time you spend on them, we recommend getting your brows laminated, also called an eyebrow perm! This is a service that involves your brow technician applying a variety of solutions that keep your brows shaped upward for four to six weeks! However, if you aren’t able to get this service, you can easily brush them upward yourself quickly and easily. Just take your spoolie brush and lightly wisp your hairs in an upward motion until all of your brow hairs are up. You will have to do this a few times during the feathered brows process, so don’t worry if they go in a different direction; just brush them up again.
Related: 25 Sensational Medium Length Haircuts for Thick Hair
3. Pluck The Strays
This step is totally optional and depends on what you are going for. Some people like to keep their brows looking as natural as possible, while others like to clean up any stragglers and trim their brows. With your brows brushed up, begin plucking excess hairs that are growing away from your brow line with a pair of tweezers. Make sure you are using a magnifying mirror so you can easily see the tiny hairs. If you have some unruly hair growing above your brow line, you can easily take care of it using a brow razor. Simply hold the razor in a position that is comfortable and begin shaving downward carefully. You want to make sure you only get the hairs above the line and not any of your brow hairs, so it’s important to go slowly and be super careful. If your brows have begun to shift during this process, give them another brush so they are back in the upward position. Check out a step-by-step tutorial showing you how to groom your brows.
4. Give Them a Trim
https://www.pinterest.com/pin/591097519863781217/
If you have some brow hairs that are growing longer than others, you can give these a trim if you want. This may seem scary if you are not used to doing it, but we promise it is so easy you will wonder why you haven’t done it before. Using a pair of eyebrow scissors (make sure they are specifically eyebrow scissors and not regular scissors), begin gently trimming across the top of your eyebrows until they are the same length. Some people say a true feathered brow isn’t trimmed, but it’s really a personal preference.
5. Apply Gel
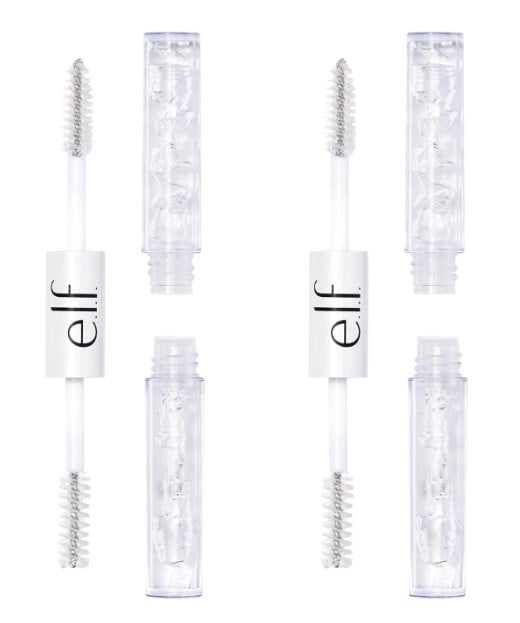
The next step is to apply a clear eyebrow gel to your eyebrows. Some people skip this step and go straight to filling them in, but if you have the time, we recommend it! Applying a coat of clear brow gel before filling them in helps keep your brows in place so they are easier to fill in. You are able to see exactly where you’re brows need to be filled, and it helps you keep the natural shape of your brows as you go. Just make sure you go light on the application and give your eyebrows plenty of time to dry before moving on to the next step.
6. Pick Your Fill In Product
You also need to decide which eyebrow product you want to use to fill in your brows. Some people love traditional brow pencils, while others prefer using a brow pomade and a brush. They also make eyebrow pencils that are angled to make it easier to get those light, tiny strokes you want for feathered brows. It really depends on what you are most comfortable using. If you decide to go with a pomade, it is essential to choose the right brush to apply the pomade. This depends entirely on what kind of brows you have. If you have smaller brows, you will want to go with a very small brush, and if you have larger brows, you should still choose one on the smaller side, but a bigger one may give you more coverage and control.
7. Measure Your Eyebrows
Start by measuring out your eyebrow to find the shape that works best with your bone structure. You can do this by laying an eyebrow pencil or brush vertically along your nose, aligning it with the center of your nostril, and then lightly marking it. Next, lay the pencil from the bottom of your center nostril to the outer corner of your eye and lightly mark it; this is where your eyebrow should end. Finally, align the pencil from the center of the nostril to the center of your eye (your pupil), and this will be your arch!
Related: Order to Apply Face Products – All You Need to Know
8. Fill Them In
Now, it’s time to fill in your brows! This is probably the most important part of the process because it can make or break how your brows turn out. You will most definitely want your magnifying mirror for this part so you can see close-ups. One important thing to remember is that you only want to fill in areas that are sparse. Going overboard will look too overdone and won’t have that light, feathery look we are going for. Begin filling in your brows, starting at the end of your brow and working your way to the center. This will allow them to look a bit heavier at the end instead of heavier in the middle, which is the opposite of what you want.
Also, you don’t want to box them in! While this is a technique that has been around for a while, it creates a totally different eyebrow look than the feathered eyebrows we are going for. You want to aim for light, airy strokes. You can accomplish this easily by holding your brow pencil or brush closer to the end so you will have a lighter hand. Holding the tool too close will end up applying too much product and prevent you from being able to blend it out. We also recommend using a clean spoolie to keep brushing your brows upward during this process.
9. Clean Them Up
Once you have perfected your brows, it’s time to clean them up. You can do this in a few different ways, depending on your skill level and your time. If you are in a hurry, you can always take a tissue and run it along the top and bottom of your brows with your fingernail to get rid of any excess product. However, we recommend using a concealer brush and concealer for this. You want to make sure the concealer brush you choose is well-defined and allows you to outline easily. We also recommend using a lighter concealer so you don’t have any orangy tones. Start by dabbing the brush in the concealer of your choice. Don’t go heavy on this part, or else you could risk getting concealer in your eyebrows, and you will have to correct it. Lightly outline your brows at the bottom to create a clean, defined line. Do the same at the top along the arch line and between your eyebrows.
10. Hold Them In Place
Now that you are done, it’s time to make sure you set your perfectly feathered eyebrows into place. To do this, you will want to go back in with your eyebrow gel or a clear mascara! Some people swear by using clear mascara to set their brows instead of brow gel because it lasts longer, but it is whatever works best for you! Simply take the clear eyebrow gel or mascara and lightly brush up on your brows to set them in place. Make sure you don’t use too much product here, or you could risk your eyebrows looking clumpy. There you have it! You are ready to turn heads rocking your stunning feathered eyebrows! Now, you can proceed to do the rest of your makeup or even rock the natural no-makeup look!
Related: 15 Easy Step By Step Smokey Eye Makeup Tutorials for Beginners